Table Of Content
Introduction
Testing your car battery is a key part of making sure your vehicle stays reliable and fires up every time you turn the key.
To get this done, you can use a multimeter, which is a pretty handy tool that measures electrical voltage, resistance, and current.
This guide is here to break down the steps for testing your car battery, using simple language so that everyone can understand and feel confident about doing it themselves.
I’ll walk through how to use a multimeter to check your battery’s health, ensuring you can keep your car in top-notch condition.
Understanding Your Tools and Safety First
Before we jump into how to test your car battery, let’s get familiar with the main gadget we’ll be using: the multimeter. This cool device is like a detective for electrical problems. It can measure different things like voltage (how much power your battery has), resistance (how hard it is for electricity to flow), and current (how much electricity is moving). For checking out your car battery, we’ll focus on the voltage part to see how much charge your battery has.

Now, let’s talk about safety because it’s super important. First things first, make sure your car is completely turned off and the keys are nowhere near the ignition. This is like making sure your home appliances are turned off before you attempt to fix or replace any parts. You don’t want any surprises!
Next up, gear up for safety. Slap on some safety goggles and gloves. Why? Well, car batteries contain acid and can create sparks. The goggles will keep your eyes safe from any unexpected splashes or sparks, and the gloves will protect your hands. It’s like wearing a helmet and pads when you skate; it’s all about keeping you safe in case something goes wrong.
By understanding how to use your multimeter and taking the right safety steps, you’re setting yourself up for success. You’ll be ready to check your car battery’s health without any hitches, keeping you and your car in good shape.
Preparing to Test a Car Battery
Before we dive into the actual testing, let’s prep your multimeter to make sure it’s all set to go. First off, double-check that your multimeter is working fine. You wouldn’t want it giving you the wrong info! The probes, those pointy metal sticks, need to be plugged into the right spots on the multimeter. You’ll see two openings with red circles around them – that’s where they go.

Now, let’s get the settings right. You want to measure your car battery’s power, which is in volts. So, you need to switch your multimeter to the DC voltage setting. Look for a symbol that looks like a ‘V’ with a straight line and maybe a dotted line under it. That’s the symbol for DC voltage, which is what car batteries use.
Since we’re checking a car battery, and they’re usually around 12 volts, you should set your multimeter to a range that can measure that. Most of the time, the 20-volt setting is perfect for this. This setting is just right because it can measure up to 20 volts, which is more than enough to get a good reading on your car battery. Check out the picture with the single red circle – that’s pointing to where you’ll find this setting on your multimeter.
Getting all these little details right means you’re all set for an accurate test of your car battery’s voltage, ensuring you get the correct information to help maintain your car’s health.
Multimeters are handy tools used in many different types of electrical and electronic projects. They help test components to see if they’re working correctly by measuring things like voltage, current, and resistance. You can use a multimeter for simple tasks like checking batteries or more complex ones like figuring out electrical problems in gadgets. Whether for school projects or home repairs, understanding how to use a multimeter can be super useful.
You can purchase the same type of multimeter in the example image using the link below.
Click to Buy the Multimeter You Need to Test a Car Battery
Test 1 - Step-by-Step Guide to Test a Car Battery Voltage
Step 1- Locate Your Car Battery
Open your car’s hood and locate the battery. It’s usually found in a corner of the engine bay. If you can’t see it there, check the trunk; It might be near the spare wheel or wheel repair kit under the cover. Identify the positive and negative terminals, which are often marked with a ‘+’ and ‘-‘, respectively. Also, you can identify them with their cable color: positive terminal is red and negative terminal is black.
But be careful about the red terminal cap. Sometimes the red cap can be attached to the negative terminal. Always take into account the connected wire colors of the terminals.
Step 2- Connect the Multimeter
With your multimeter set to measure DC voltage, connect the red probe to the positive terminal of the battery and the black probe to the negative terminal. It is crucial to ensure proper contact to get an accurate reading.

Step 3- Read the Voltage
Now, observe the reading on the multimeter. A healthy car battery should show a voltage between 12.4 to 12.7 volts. If your reading is in this range, your battery is in good condition.

Understanding Your Multimeter Reading: Test a Car Battery
Getting to grips with what your multimeter tells you when you test your car battery is key. When you hook up the multimeter to your car battery and take a look at the reading, the numbers give you the inside scoop on your battery’s health.
Here’s how to decode those numbers: If your multimeter shows a voltage of less than 12.4 volts, it’s like your battery is saying, “I’m feeling a bit low!” This means your battery doesn’t have enough juice and might need a good recharge to get back in shape. If the recharge doesn’t help much, it might be time to think about getting a new battery.
Now, if the reading drops below 12 volts, that’s your battery’s way of crying out for help, indicating it’s really low on power. In this case, it’s almost certain you need a new battery because it’s too drained to work properly.
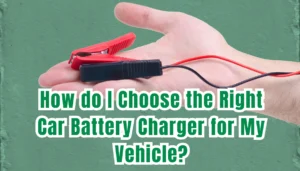
But don’t worry if you find your battery undercharged! If it’s the first time this has happened, you might not need to rush out to buy a new battery just yet. You can invest in a decent battery charger that’s right for your car’s battery.
Using the charger, you can pump up your battery to the right charge level without spending too much. This way, you can save some money and learn a bit about car maintenance along the way. Plus, it’s a more budget-friendly option than getting a new battery right off the bat.
Click to Choose the Right Battery Charger

Additional Checks
Testing your car battery’s voltage gives you a good snapshot of its health, but to really understand what’s going on, you should do a couple more checks:
- Inspect the Battery Terminals: Start by taking a look at the battery terminals, those metal posts on the battery where the cables connect. You’re checking for corrosion – that white or greenish crusty stuff that can build up. Corrosion can mess with your car’s ability to start and run smoothly. If you see any gunk or damage, it’s time for a cleanup. Use a wire brush to scrub off the corrosion carefully, and make sure the cable connections to the terminals are snug and secure. Loose connections can cause trouble, too.
- Check the Battery Age: Batteries aren’t meant to last forever. Typically, a car battery’s best days are within its first 3 to 5 years. After that, it’s living on borrowed time. Even if the voltage check shows it’s okay, an old battery can fail unexpectedly because it just doesn’t hold a charge as well as it used to. So, if your battery is getting up there in age, replacing it might be a wise move to avoid getting stranded somewhere inconvenient.
Together with the voltage test, these additional checks can help you get a full picture of your battery’s condition. This way, you can make informed decisions about whether to clean up and tighten connections, charge up the battery, or maybe start shopping for a new one. It’s all about making sure your car is as reliable as it can be, so you’re not caught off guard by battery issues.
Test 2- Voltage Drop Test on the Battery Terminals and Terminal Clamps
When you test the voltage at your car’s battery terminals, it’s like making sure the battery’s energy can really get to the car’s systems where it’s needed. We’ll use a multimeter again, which helps you see how much power is moving from the battery to the car.
Why Peek at the Battery Terminal and Clamp Voltage?
Your battery terminals and clamps get all gunky over time. Even if your battery is all charged up and ready to go, that gunk can stop the power from getting through properly. By checking the voltage, you can spot if there’s a problem with the power flow because of dirty or loose connections.
Here's How to Do the Test
- Get Your Multimeter Ready: Switch it to the voltage check mode, which usually has a ‘V’ sign. Since we’re dealing with car batteries, you’ll use the setting for DC voltage.
- Measure Straight from the Battery: First up, measure how much voltage is right there at the battery terminals. Put the red probe on the positive (+) side and the black probe on the negative (-) side. Write down what the multimeter says; a fully charged battery usually shows about 12.6 volts.
- Check the Terminal and Clamp Connection: Now, test each connection by putting one probe on the battery’s metal bit (terminal) and the other on its clamp. You should do this for both the plus and minus sides. Normally, these readings should be pretty much the same as your first measurement.
Understanding What Your Test Shows

- If the numbers go down when you check between the terminal and the clamp, it means something’s blocking the power, maybe because of corrosion or a loose connection.
- If everything’s clean and tight, the voltage shouldn’t drop at all between the terminal and the clamp and must be shown as 0 (zero) volts.

If You Need to Clean Things Up
Found a drop in the voltage? It might be time to clean up:
- Disconnect the battery Safely: Take off the clamps, the negative one first and then the positive one.
- Scrub Away the Grime: Use a wire brush or a special tool to clean off any crud. Mixing some baking soda with water can help get rid of battery acid junk.
- Put it All Back and Test Again: Once everything’s shiny and clean, hook the clamps back on (positive first, then negative) and see if that voltage drop issue is fixed.
By keeping an eye on your car battery’s terminal and clamp voltage, you can make sure your battery is always ready to roll and keep your car running smoothly.
You can watch the video below about the voltage drop test on the battery terminals and terminal clamps.
Test 3- Voltage Drop Test on Your Car Battery While Starting the Engine
Testing the voltage drop on your car battery while the engine is cranking or starting up is like checking how strong your battery is when it needs to work the hardest. This test helps you figure out if your car’s battery and its connections are strong enough to power the engine correctly when you turn the key.
Why Test When the Engine Cranks?
When you start your car, the battery has to give a big burst of energy to get the engine running. This is when it’s under the most stress, so it’s the perfect time to see if everything’s working right. If there’s a big voltage drop during this time, it might mean there are some weak spots in the electrical system that need fixing.
How to Do the Starting Engine Voltage Drop Test
- Get Your Multimeter Ready: You’ll need a multimeter set to measure volts. Make sure it can handle the quick changes in voltage when the car starts.
- Get Some Help: You might need a friend because you’ll have to watch the multimeter while they start the vehicle.
- Connect the Multimeter: Attach one probe to the positive terminal of the battery and the other to the starter motor’s positive connection. These are the main points where the enormous energy flow happens when the car is starting.
- Watch the Voltage as the Car Starts: Have your friend turn the key to start the engine. Keep an eye on the multimeter. It will dip down for a second as the engine cranks.
What to Look For
- Regular Voltage Drop: If everything’s working well, you’ll see the voltage drop a bit, but it shouldn’t go below 9.6 volts while cranking. If it stays above this level, your battery and connections are probably in good shape.
- Big Voltage Drop: If the voltage falls below 9.6 volts while the engine is cranking, it could mean your battery is weak, or there’s a bad connection somewhere that’s stopping the power from flowing properly. If the voltage falls around 5 volts that means your car battery already is dead.
Why the Starting Engine Voltage Drop Matters
Doing this test can save you from being stuck in a car that won’t start. It helps you catch problems early so you can fix them before they get bigger. Plus, it’s a smart way to make sure your car is always ready to go when you are.
By learning how to check your car’s battery power when it’s cranking, you’re taking a big step in being smart about taking care of your car. It’s all about making sure everything works right so you can have a smooth drive every time.
Conclusion
Using a multimeter to check your car battery is an easy yet important skill that can prevent sudden car issues. With just a few straightforward steps, you get to peek into your battery’s health and figure out if everything’s in tip-top shape or if you need to take action. This could mean charging the battery, cleaning up connections, or even getting a new battery to keep your car running smoothly.
Keeping an eye on your car battery’s condition through regular checks is a smart move. It’s like having a regular health check-up; it catches problems early, helping you avoid those moments when your car just won’t start. Plus, this proactive approach prolongs your battery’s life, ensuring you get the most out of it before you need a replacement.

When you understand how to use a multimeter to test your battery, you’re not just doing routine maintenance; you’re ensuring your car is safe and dependable for every journey. And hey, if anything seems confusing or if the battery issues seem bigger than a simple test can solve, it’s wise to call in a pro, like a trusted mechanic. They can take a deeper look and make sure everything’s working as it should, keeping you safe from potential mishaps.
By embracing these practices and boosting your know-how on battery testing, you’re stepping up your car care game, leading to safer and more reliable driving adventures. Remember, it’s all about staying proactive and informed. So, keep testing, stay observant, and enjoy the smooth rides ahead. Safe driving!
Please note that this post contains affiliate links. This means if you click on a link and make a purchase, we may receive a small commission at no extra cost to you. Our reviews and recommendations are based on our own opinions and analysis, and we aim to provide you with the most accurate and helpful information to make your decisions. Your support helps us continue to provide valuable content. Thank you for your understanding and support.