Table of Contents
Introduction: How to Test an Alternator?
There has probably been a time before when you tried to start your car, but it did not work. Sometimes, the problem could be with the alternator, which is the power generator of your car. It keeps the 12V car battery charged and makes sure all the electrical stuff in your vehicle works properly while the engine is working or while you are driving. Knowing how to check your alternator is super important because it can help you avoid those “Oh no, my car won’t start!” moments and keep your ride smooth.
In this guide, we’re going to explore how alternators work and show you how to test yours to make sure it’s doing its job right. This is perfect for anyone, whether you’re just starting to learn about cars, you love all things automotive, or you just want to know more about how your car works. We’ll cover what signs to look out for when an alternator might be failing and what tools you’ll need to test it. I’ll also give you a step-by-step guide on how to do the test yourself.
By the time we’re done, you’ll be able to figure out if your alternator is fit and healthy or if it’s time to visit the mechanic. So, let’s dive in and clear up the mystery of how to test an alternator, making sure you and your car can keep hitting the road without any hiccups.
Get ready to gear up your car knowledge! I am about to take you on a journey of learning how to test your alternator, ensuring that your car stays in top-notch condition for all your adventures. Let’s roll and make sure your car is always ready to go whenever you are!
I mentioned an experience with the broken alternator in one of my other blogs and want to write about it again, especially in this post below. Because it is very important to know about that if you have such a moment like that.
It was six months ago. I’ve been having trouble starting the car for the last few days. I thought that the car’s battery could no longer hold much energy due to its age. In those days, I went to a car parts store and bought a new battery.
But the next day I encountered the same problem again. The car was having difficulty starting. And that time I understand that the alternator might have been dying. But the car needed fuel and I have to go to the closest petrol station. So, I started the car and got on my way.
While going up a small hill, suddenly many malfunction warnings and fault lights started to light up on the dashboard. ABS light failure, hydraulic brake failure, ignition system failure, power steering failure, all warning lights came on and warning messages were displayed on the screen. It was like the car was out of control. This was the first time in my life that such an incident happened to me.
I immediately stopped the car, trying to pull over and park the car in a suitable place. Because I was driving on a road with busy traffic. And it was really difficult to control the car, the steering wheel was so heavy that I had to turn it with both hands and the brakes were not braking fully. When I got to the side of the road, I had to stop the car completely with the handbrake.
I called the roadside assistance service and explained the situation. I remember waiting for the roadside assistance service for a couple of hours, which felt like forever!
After the technician arrived and tested my car with his portable battery, he confirmed the problem was with the alternator not doing its job of charging the battery. The alternator was completely dead. I ended up having to tow the car to the closest mechanic to get it fixed.
So, let’s jump into the topic: “How to test an alternator?” But firstly, we need to talk about what an alternator is!
What is an Alternator?
So, what’s an alternator, and why is it so important for your car? Before learning how to test an alternator, we need to know what it is. Let’s break it down. An alternator is like the heart of your car’s electrical system. It’s a little machine attached to the engine that works hard to keep the battery charged and powers all the electrical stuff in your car, like the lights, radio, and AC.
When you start your car, and the engine begins to run, the alternator gets to work. It spins around and generates electricity. This electricity is what keeps your battery full of energy and makes sure all the gadgets and lights in your car have the power they need to function.
Think of the alternator as a mini power station that’s always on the go, creating energy for your car.
Without a working alternator, your car’s battery would run out of juice pretty quickly, and you wouldn’t be able to start your car or use any of the electrical features inside. Even if it fails while driving, it might be a very hard moment for you, like I had before.
In short, the alternator is super important because it keeps your car alive and kicking, making sure you have a smooth and enjoyable ride without any power problems. It is better to watch the video as well.
Signs of a Failing Alternator
Have you ever wondered how you can tell if your car’s alternator might be having a tough time? There are some telltale signs that can give you a heads-up before things go south. Let’s go through the symptoms of a failing alternator to keep you one step ahead in your car care game.
- Dim or Overly Bright Lights: If your car’s lights start acting weird, like getting dimmer or suddenly way too bright, it might be your alternator sending out an SOS. The alternator provides power to your lights, so any changes in lighting could be a sign it’s not working right.
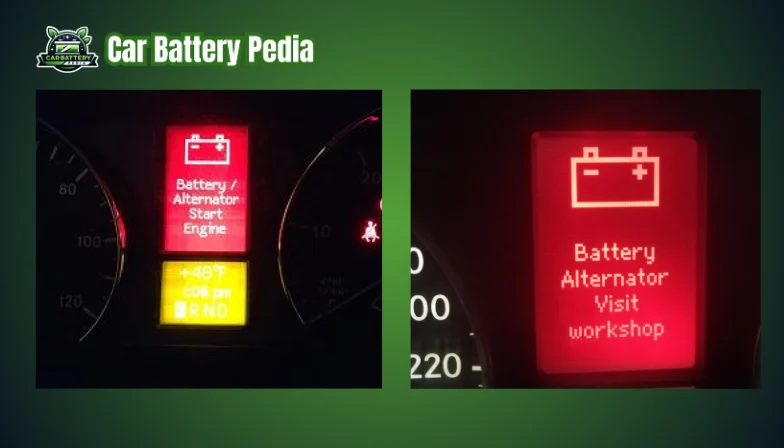
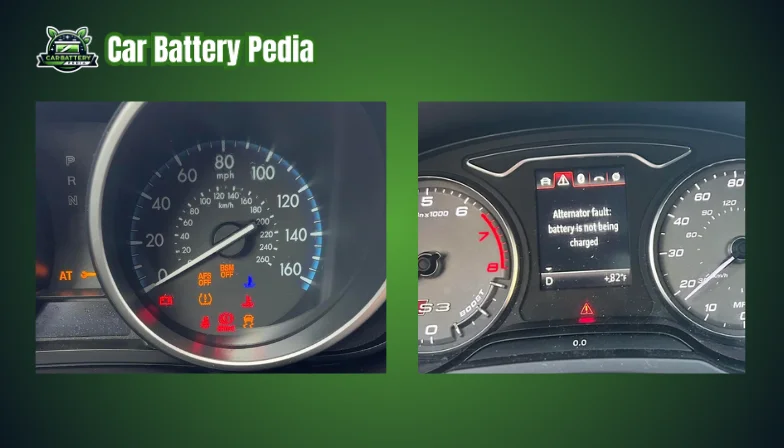
- Warning Lights on the Dash: Most cars have a warning light on the dashboard that shows a warning about the alternator. If this light pops up, it’s your car’s way of telling you that the alternator might be on the fritz. Check out the pictures below from different cars showing the alternator fault on the dashboard.
- Strange Noises: Alternators have a lot of moving parts, and if something’s not right, it might make some odd noises. A failing alternator can sound like a rumbling, whining, or growling noise coming from under the hood. Also, when you open the hood, you can hear different noises, like in the video below. This alternator has a bad bearing.
- Electrical Issues: Since the alternator powers all the electrical components in your car, problems like the radio or air conditioner suddenly turning off, the power windows moving slower, or issues with the car’s infotainment system can all point to an alternator issue.
- Engine Stalls or Difficulty Starting: Your car’s engine relies on the alternator for power. If the alternator is failing, you might find that your car is hard to start, or the engine might cut out unexpectedly while you’re driving.
- Battery Problems: If your battery keeps draining or won’t hold a charge, the real trouble could be with the alternator, not the battery itself. Since the alternator’s job is to charge the battery, if it fails, the battery will quickly drain.
Recognizing these signs early can save you a lot of trouble and prevent you from getting stranded. If you notice any of these issues, it’s a good idea to test your alternator or have a professional check it out to make sure everything’s running as it should.
Tools and Preparation
Before you start testing your alternator, you need the right tools and some preparation to make sure you do it safely and correctly. Let’s go over what you’ll need and how to get ready for the test.
Tools You’ll Need:
- Multimeter: This is the main tool you’ll use to test your alternator. It’s a handy device that measures electrical voltage, current, and resistance.
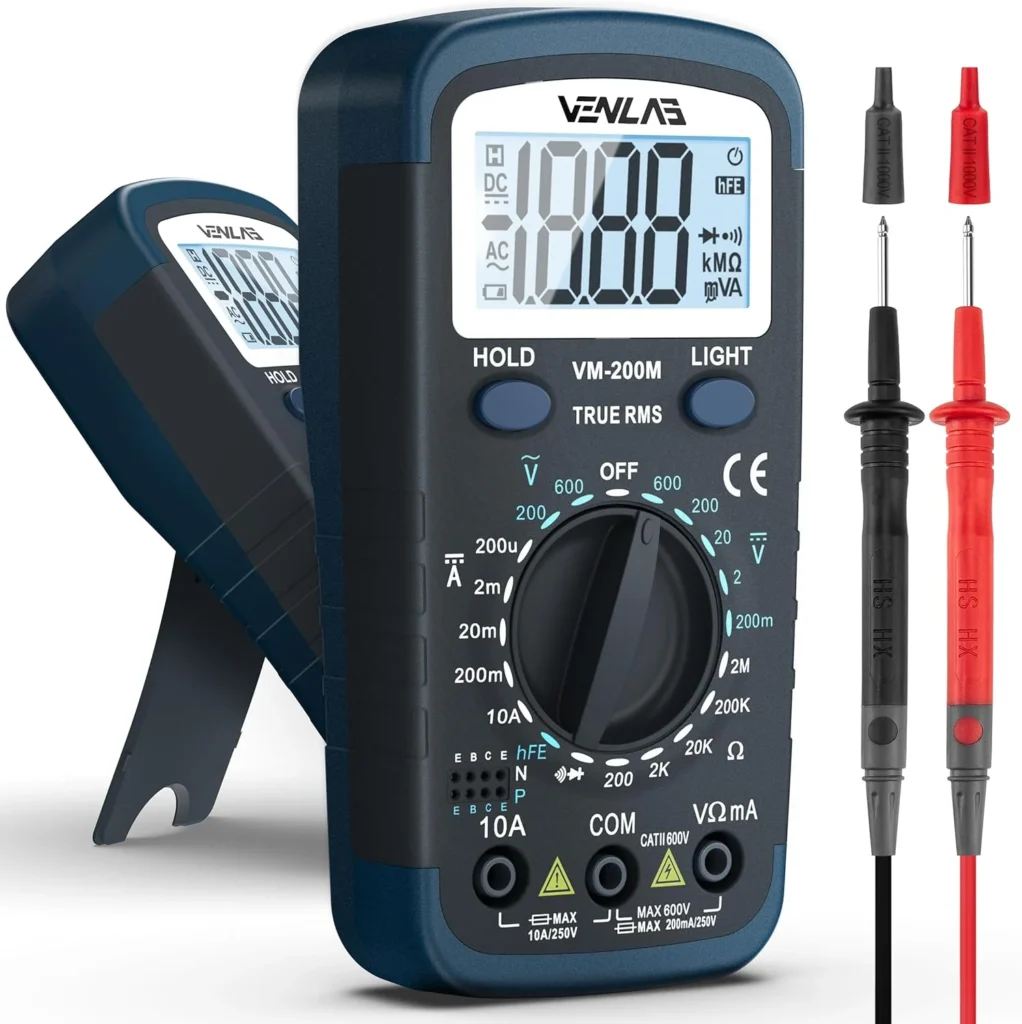
Amazon UK – Click to Buy a Multimeter
Amazon US – Click to Buy a Multimeter
- Safety Gear: Safety first! You should wear protective gloves and safety goggles to protect yourself from any sparks or unexpected battery acid splashes.

Amazon UK – Click to Buy Safety Glasses
Amazon US – Click to Buy Safety Glasses

Amazon UK – Click to Buy Safety Gloves
Amazon US – Click to Buy Safety Gloves
- A Well-lit Workspace: Make sure you have enough light to see everything clearly. Working in a dim area can make it hard to see what you’re doing, which isn’t safe.
Getting Ready:
- Read Your Car’s Manual: Every car is a bit different, so check your manual for any specific instructions or precautions related to your alternator or electrical system.
- Turn Off the Car: Make sure your car is off and the keys are removed from the ignition. You don’t want the engine running while you’re testing the alternator.
- Let the Engine Cool Down: If you’ve just driven your car, wait until the engine cools down before you start working on it. A hot engine can be dangerous to work around.
- Check the Battery: Before you test the alternator, your car’s battery should be in good condition and fully charged, around 12.6 volts. If the battery is weak or dead, the test results might not be accurate.
- Secure the Car: Ensure your car is parked on a flat surface and the parking brake is engaged. You don’t want the car moving while you’re working on it.
By gathering the right tools and preparing your workspace and car, you’re setting the stage for a successful alternator test. Taking these steps helps ensure that you can perform the test safely and get accurate results. Now, you’re ready to start testing your alternator and make sure your car is in top-notch condition!
Step-by-Step Guide to Test an Alternator
Testing your alternator is like playing detective with your car – you’re checking to make sure it’s doing its job right. Here’s how you can do it step by step, even if you’re new to car mechanics.
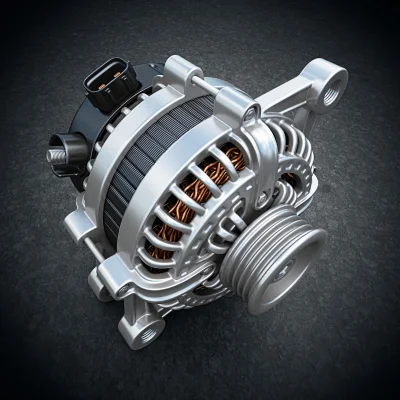
Step 1: Locate Your Alternator
First, you need to find where the alternator is in your car. It’s usually on the front of the engine and looks like a metal piece with a pulley on one side. If you’re not sure, your car’s manual can help you find it.
Step 2: Check for Physical Damage
Take a look at the alternator and the area around it. Are there any loose wires or belts? Does the alternator itself look damaged or excessively dirty? These could be signs of problems.
Step 3: Set Up Your Multimeter
Grab your multimeter and set it to measure voltage, which is often marked as ‘V’ on the dial. Make sure it’s ready to read at least 20 volts, as car batteries usually operate around 12-14 volts.

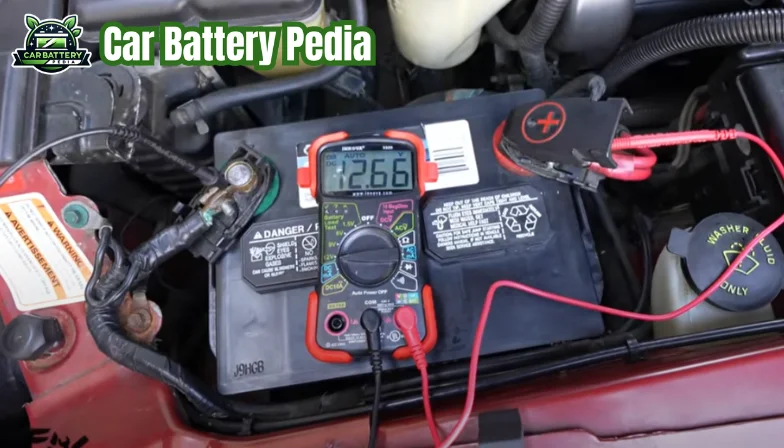
Step 4: Test the Battery First
Before testing the alternator, check your battery’s voltage to make sure it’s charged. Connect the multimeter’s red lead to the battery’s positive terminal and the black lead to the negative terminal. A fully charged battery should show around 12.6 volts.

Step 5: Start the Engine
With the multimeter’s leads connected to the battery, turn on your car’s engine.
The voltage on the multimeter should increase slightly when the engine is running, usually between 13.6 and 14.6 volts.
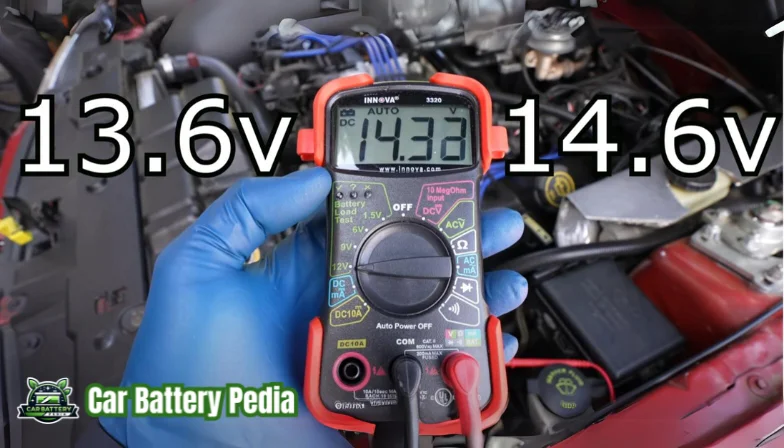
This increase is a good sign that your alternator might be working as it should be charging the battery. If it goes higher than 14.6 volts, it means your alternator isn’t charging correctly, and a mechanic should check it.
Step 6: Perform the Loaded Test
With the engine running, turn on your car’s headlights, air conditioner, and any other electrical items to create a load. This tests if the alternator can handle working under pressure. Watch the multimeter’s reading; it shouldn’t drop below 13 volts. If it does, your alternator might be struggling to keep up with the electrical demand.
Step 7: Listen for Strange Sounds
While the engine is running, listen carefully. As we mentioned above, any unusual noises like whining or grinding coming from the alternator area can be a sign of internal damage.
Step 8: Turn Off the Engine and Review
Turn off your car and review what you’ve found. If your multimeter readings were within the normal range and there were no strange noises or visible damage, your alternator is likely in good shape. If not, it might be time for a professional check-up.
Testing your alternator regularly helps keep your car reliable and prevents unexpected breakdowns. By following these steps, you’re not just doing routine maintenance; you’re ensuring your car is always ready for the road ahead.
Understanding the Results
After you’ve tested your alternator with a multimeter, you’ll see some numbers on the display. These numbers tell you how well your alternator is working. Let’s decode what these results mean so you can understand the health of your car’s alternator.
Normal Voltage Range
If your multimeter shows a reading between 13.6 and 14.6 volts when the car engine is running, you’re in the clear! This range means your alternator is doing its job perfectly, charging the battery just right and powering your car’s electrical systems.
Too Low Voltage
Now, if the reading is below 13.5 volts, especially if it drops under 12.6 volts while the engine and other electrical loads are on, it’s a sign that the alternator isn’t producing enough power. This could be due to a variety of issues like worn-out parts, loose belts, or internal damage to the alternator itself.
Too High Voltage
On the flip side, if the multimeter shows a voltage higher than 14.6 volts, your alternator might be overcharging the battery. This isn’t good either, as it can lead to the battery getting damaged over time or even affecting other electrical components in your car.
Consistency is Key
While you’re testing, watch if the voltage remains steady or if it fluctuates. A healthy alternator should provide a steady voltage output. If the numbers are jumping up and down, this could indicate an issue with the alternator’s ability to provide consistent power.
Listening to Your Car
Don’t forget about any strange noises you heard during the test. Noises like rattling, grinding, or whining from the alternator can point to mechanical problems that need to be addressed.
Next Steps
If your test results fall outside the normal range or if you hear unusual noises, it might be time to take your car to a professional mechanic for a more thorough inspection. They can pinpoint the exact problem and fix it, ensuring your alternator won’t let you down when you need it most.
By understanding what the numbers and signs are telling you, you can make smart decisions about maintaining your car. Keeping your alternator in good shape means your car will be more reliable, and you’ll avoid being stranded with a dead battery or other electrical issues.
Maintenance Tips for Your Alternator
Taking care of your alternator is key to making sure your car stays running smoothly. Here are some maintenance tips to help you keep your alternator in top condition:
1. Regularly Check the Alternator Belt
The belt that drives the alternator should be in good shape and properly tightened. If the belt is frayed, cracked, or looks worn out, it’s time to replace it. A loose belt can cause the alternator to work inefficiently or not at all, leading to battery drainage.
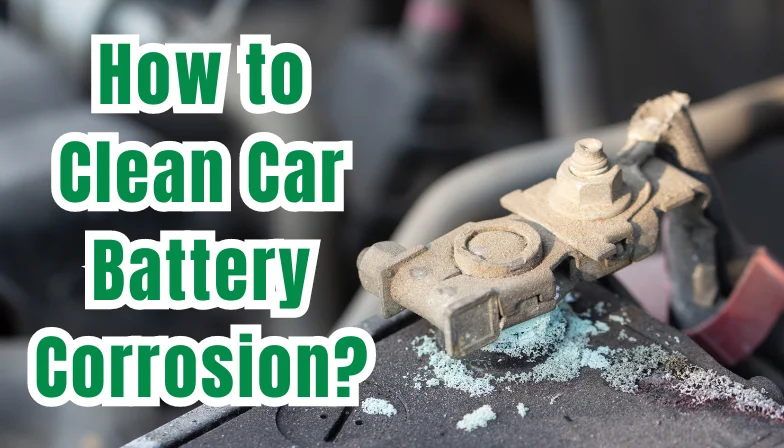
2. Keep the Battery Healthy
Since the alternator charges the battery, making sure your battery is in good condition can help the alternator function better. Check your battery regularly for corrosion and clean the terminals to ensure a strong connection.
3. Listen for Noises
Pay attention to any unusual sounds coming from the alternator area. Noises like whining, grinding, or clicking can indicate that something’s wrong inside the alternator.
4. Check for Leaks
Make sure there are no fluid leaks around the alternator. Oil or coolant leaks can damage the alternator’s internal parts and affect its performance.
5. Inspect Electrical Connections
All the electrical connections to the alternator should be secure and free from corrosion. Loose or dirty connections can prevent the alternator from charging the battery properly. If you see some dirt and corrosion around the sockets and connections, you can use a contact cleaner like the one below to clean them.

6. Schedule Regular Check-Ups
Even if everything seems fine, having your alternator checked by a professional mechanic during regular car maintenance can catch issues before they turn into bigger problems.
7. Know Your Car’s Systems
Familiarize yourself with how your car’s electrical system works. Understanding what’s normal for your car can help you spot when something’s not right.
By following these maintenance tips, you can help extend the life of your alternator and avoid unexpected car troubles. Regular care and attention to your alternator mean you can rely on your car to start and run properly, keeping you and your vehicle safely on the road.
In summary, it is better for you to watch the video below to understand everything we cover here and one more test for advanced controllers.
Conclusion
Testing your alternator is like doing a health check for your car’s electrical system. By understanding how to test the alternator and recognizing the signs of potential issues, you can avoid the headache of being stuck with a car that won’t start.
We’ve gone through what an alternator is, how to spot when it might be failing, the tools you need to test it, and the steps to check if it’s working right. We also covered how to interpret the test results and what to do if things seem off. Plus, we talked about how to take care of your alternator to keep it running well.
Remember, a healthy alternator means a reliable car. Regular checks and maintenance can save you time, money, and stress in the long run. If you ever feel unsure about testing the alternator yourself or if the test results indicate a problem, feel free to get help from a professional mechanic. They can provide a more thorough examination and fix any issues properly.
By keeping up with your alternator’s health and addressing any problems early, you ensure that your car stays in great shape. This way, you can enjoy your rides, knowing your car won’t let you down. So, take this guide and use it to look after your car’s alternator and keep those wheels turning smoothly on all your journeys!

Please note that this post contains affiliate links. This means if you click on a link and make a purchase, we may receive a small commission at no extra cost to you. Our reviews and recommendations are based on our own opinions and analysis, and we aim to provide you with the most accurate and helpful information to make your decisions. Your support helps us continue to provide valuable content. Thank you for your understanding and support.