Table of Contents
Introduction: Mastering the Jump Start a Car Battery
Dealing with a flat car battery can really throw a wrench in your plans, whether you’re rushing to get somewhere or stuck in a place where you’d rather not be.
Don’t Worry! It’s not the end of the road!
Learning how to jump-start your car can turn this frustrating situation into a minor speed bump. In this guide, we’re going to dive into two foolproof methods to bring your car back to life: using jump-start cables and wielding a portable jump starter.
First off, we’ll explore how to use jump-start cables, those long wires with clamps that can transfer power from a good battery to a dead one. It’s like giving your car a helpful nudge from a friend to get it moving. We’ll go through each step, from positioning the cars correctly to attaching the cables in the right order to make sure you can do it safely and effectively.
Then, we’ll check out the portable jump starter, a handy gadget that lets you jump-start your car without needing another vehicle. It’s like having a power boost in a box that you can carry with you, ready to save the day whenever your battery decides to take an unexpected break.
I’ll break down everything into easy-to-understand steps, so even if you’re not a car expert, you’ll feel confident in getting your car running again. With the right approach and a bit of know-how, you’ll see that jump-starting a car is a skill you can master, ensuring you’re never left stranded with a flat battery again.
Let’s gear up and learn how to tackle this like a pro!
1. How to Jump-Start with a Booster Cable Kit
When your car doesn’t start, using booster cables and another vehicle with a charged battery can be a lifesaver. This method might seem simple, but it’s super important to follow the right steps and safety measures to make it work. Before you start, you need to check out the other vehicle’s battery. It’s got to have enough juice to not only start its own engine but also help get your car going.
Here’s what you need to know: First, both cars should be facing each other, ideally nose to nose, or close enough so the cables can easily reach both batteries without stretching too tight. Make sure both cars are turned off and the keys are out of the ignition.

Now, about the assisting vehicle’s battery: If it’s too weak or smaller than what your car needs, it might not have enough power to kickstart your battery. Trying to jump-start with a battery that can’t handle the load won’t work well and might just end up being a frustrating experience. You want to avoid a situation where you’ve got the cables hooked up, but nothing happens because the other car’s battery just can’t cut it.
To ensure a smooth jump start, the helper vehicle should have a strong and fully charged battery, ideally similar in size and power to your car’s battery. This way, when you connect the booster cables, there’s plenty of power flowing to give your car the boost it needs to wake up.
Actually, I had this kind of situation last month. One of my cars, which is a 1.5L diesel, didn’t start because of the old battery. I called my friend with a 1.2L petrol car to jump-start my car. We positioned the cars and connected the cables, and then my friend started his car. We waited about 2 minutes, and I tried to start my car. But in surprise, my car tried but couldn’t make the engine start. We tried 2 times but it didn’t work.
Then, we thought his battery also might have weak power and tested it with a multimeter. Yes, we were right. His battery voltage was 12.2 Volts. Because of the low voltage and maybe the lower level amp capacity, even though his car was working, it couldn’t start my car. My battery was 70 Amp, and his car has a 51 Amp battery.
Anyway, after that we went to a car parts shop to get a new battery and I replaced it later that day.
Remember, the right vehicle positioning, a good set of booster cables, and a capable assisting car with a healthy battery are key factors for a successful jump start. By paying attention to these details, you’re setting yourself up for a successful battery revival, getting your car running again with less stress and more success.

Preparing Your Equipment
Just in case, remember again: Ensure that you have a good quality set of jumper cables and access to another vehicle with a fully charged battery. Before you start, both cars should be parked facing each other, about 18 inches apart, but not touching. Turn off both engines and engage the parking brakes to ensure safety.
Connecting the Cables
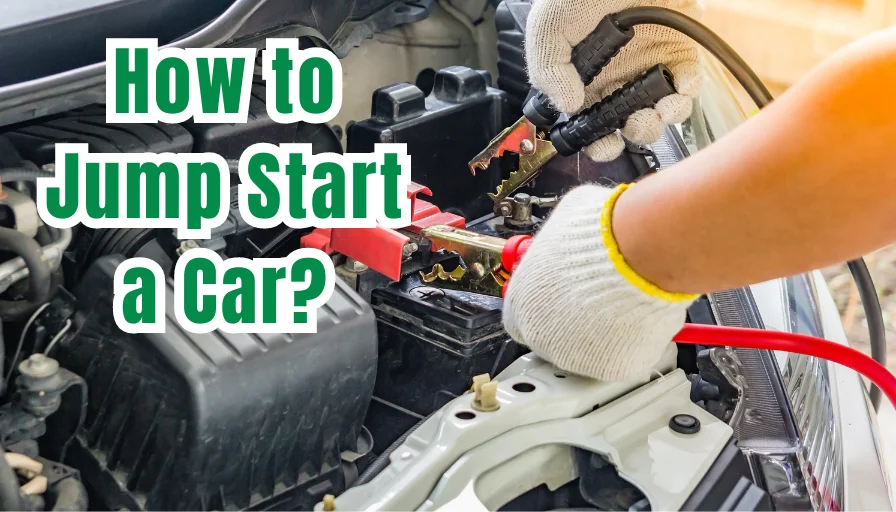
Alright, let’s talk about hooking up those jumper cables correctly. It’s super important to know what you’re doing so you don’t accidentally cause a spark or damage the car. Both vehicles have positive (+) and negative (-) battery terminals, and it’s crucial to connect them in the right order.

- Spot the Terminals: First things first, you need to find the positive (+) and negative (-) terminals on both car batteries. The positive terminal is usually marked with a plus sign (+) and might be covered with a red cap, while the negative terminal has a minus sign (-) and often features a black cap.
- Start with the Dead Battery: Grab the red clamp from your jumper cables (these are usually red to match the positive terminal). Clip this red clamp onto the positive terminal of the dead battery in your car. Make sure it’s nice and tight on there.
- Move to the Charged Battery: Now take the other red clamp and attach it to the positive terminal of the battery in the car that’s going to help jump-start yours. Again, check that it’s securely connected.
- Connect to the Good Car’s Negative Terminal: Next, you’ll take one of the black clamps (these are typically black to match the negative terminal) and hook it up to the negative terminal of the good car’s battery. This starts to complete the circuit needed to transfer power.
- Ground the Last Clamp: For the final step, you don’t connect directly to the dead battery’s negative terminal. Instead, you should clip the remaining black clamp to a solid, unpainted metal part of the engine block or frame of the car with the dead battery. This is called grounding, and it helps to make the jump-starting process safer by reducing the risk of sparks near the battery.

By following these steps, you create a safe pathway for electricity to flow from the charged battery to the dead one. This sets everything up for a successful jump-start, ensuring that you can get your car back on the road without any hiccups. Just remember to attach everything securely and in the right order, and you’ll be all set!
Starting the Engines
Once you’ve got all the cables connected right, it’s time to get those engines running. But there’s a specific order and way to do this to make sure everything goes smoothly.
- Fire Up the Charged Car: Kick things off by starting the engine of the car with a good battery. Let it run for a few minutes. This isn’t just to warm it up; it’s actually helping to push some charge into the dead battery in the other car, giving it a little wake-up call and making it easier to start.
- Reviving the Dead Battery: Now, head over to the car with the dead battery. Try to start it up. If everything’s gone right with the cable connections and the other car’s battery is strong enough, your car should start. If it doesn’t catch the first time, don’t lose hope. Give it a minute and try again. Sometimes, it just needs a second or third try to get going.
- Let it Charge Up: After your car starts, don’t just zoom off. Let it sit and idle for a bit. This helps the battery charge up more fully. Think of it like warming up before a sprint; your car needs a little time to get all its energy back, especially after being jump-started.
By following these steps and giving each car the time it needs to do its part,
you’re not just getting the dead car started again; you’re also helping to recharge its battery.
This ensures that your car will be ready to take you wherever you need to go next, with a battery that’s got enough juice to get the job done.
Disconnecting the Jumper Cables
Alright, you’ve successfully jump-started the car, and it’s purring like a kitten. Great job!
But the task isn’t over yet.
Now, you need to safely remove those jumper cables to prevent any sparks or short circuits. And, you’ll want to ensure your car’s battery gets fully charged up, especially while driving.
- Reverse the Order: Remember how we connected the cables step by step? Now, we do the reverse. Start by removing the black clamp from your car’s engine block or metal surface. This is the grounding clamp we attached last.
- Move to the Helper Car: Next, go over to the other car (the helper car) and remove the black clamp from its battery. Doing it in this order minimizes the risk of sparks.
- Red Clamps Next: Now, detach the red clamp from the helper car’s positive terminal. Be careful to keep the clamp ends from touching each other or any part of the car until they’re all disconnected.
- Finish with Your Car: Lastly, remove the red clamp from the positive terminal of your car’s battery. Now all the clamps are off, and it’s done safely!
- Charge While Driving: Once the cables are off, your job isn’t quite finished. Your car’s battery got a boost from the jump start, but it needs more juice to charge up fully. The best way to do this is by driving your car for at least 40 minutes to 80 minutes without turning it off. This allows the alternator (the part that charges the battery while the engine runs) to do its job and recharge the battery after the jump-start. It’s like giving your battery a hearty meal after it’s been running on empty.
If it shows 12.7 volts when you measure it with a multimeter, it means it is 100% charged.
By carefully reversing the cable connection sequence and then driving your car for a while, you ensure that not only is your car up and running again, but its battery gets a good, strong charge. This makes it more likely that your car will start up easily the next time you need to use it.
2. How to Jump-Start with a Jump-Starter (Booster) Pack
A portable booster pack is like the cool, new gadget in the world of car care, giving you a super smart way to get your car running if the battery dies. You don’t even need another car to help jump-start yours, which is pretty awesome. Think of it as having a mini power station that’s ready to help out whenever your car’s battery decides to take an unexpected break.

This gadget is a game-changer, especially when you find yourself in a tight spot, like if your car won’t start and you’re late for work or stuck somewhere far from home. Instead of waiting for another car to come along with jumper cables, you just whip out your portable jump starter, hook it up to your car’s battery, and voilà – your car is back in action in no time.
Having one of these portable booster pack in your car is like being that super-prepared person everyone admires. It’s not just about dealing with emergencies; it’s about feeling confident and ready for whatever comes your way while you’re on the road. It’s a smart move for any driver, whether you’re a road trip enthusiast, someone who has an older car that’s a bit unpredictable, or just someone who likes to be ready for anything.

Setting Up the Jump Starter Pack
Before you start using a jump starter pack, you’ve got to make sure it’s ready to go. That means checking that it’s fully charged. A jump starter pack needs to be all powered up to give your car’s battery the boost it needs to start.
First things first, charge up your jump starter pack until it’s full. Once it’s got all the juice it needs, bring it over to your car’s battery, but keep it turned off for now. You want to avoid any accidental zaps or sparks when you’re hooking it up.
Now, let’s get it connected. Find the positive terminal on your car’s battery, which usually has a plus sign (+) or is covered in red. Take the red clamp from your jump starter pack and clip it onto this positive terminal. Make sure it’s snug and secure.
Next up, you need to connect the black clamp to a good grounding spot on your car. This isn’t just any random point; it should be a clean, unpainted metal part of the car’s frame or engine block. This spot acts as a safe path for the electric current, helping to prevent any short circuits or sparks.
It’s really important to choose the right spot for the black clamp, one that’s away from the battery and any fuel lines, to keep things safe and effective.
By following these steps, you set up your jump starter pack the right way, making sure you can safely and effectively give your car’s battery the power it needs to start up again.
Starting Your Car with the Jump Starter Pack
Now that you’ve got your jump starter pack hooked up right and safely, it’s time to get your car running again. Switch on the jump starter pack to let it send power to your car’s dead battery. Then, go ahead and try to start your car.
If your car roars to life, that’s awesome! It means the jump starter pack did its job perfectly, getting you out of a sticky situation. Once your car is running, don’t rush to turn it off. Let it idle and run for a few minutes.
Why keep it running? Well, this time, it allows your car’s battery to recharge itself. The alternator (it’s a part of your car that charges the battery while the engine runs) needs some time to do its thing and pump some energy back into the battery. This helps make sure that when you turn off the car and need to start it again later, the battery will have enough power to do so without any trouble.
So, by letting your car run for a while after jump-starting, you’re giving the battery a good recharge, which helps ensure you won’t be stuck with a dead battery again too soon.
Disconnecting the Pack
After your car is running smoothly and the battery has had some time to recharge, it is time to disconnect the jump starter pack safely.
Begin by turning off the pack to halt the power supply. Carefully remove the black clamp first to disconnect the grounding link. Following this, detach the red clamp from the positive terminal of your car’s battery. This sequence helps prevent sparking and ensures the safety of both the vehicle and the user during the disconnection process.
You must drive your car for at least 40 to 80 minutes without turning it off to fully charge the battery.
Then, test it with a multimeter to see if the voltage is about to hit 12.7 volts.

Final Thoughts and Additional Tips
Mastering the techniques to jump-start your car ensures that a dead battery won’t leave you stranded. Whether you opt for traditional jumper cables or a portable jump starter pack, both methods are effective when executed correctly. However, it’s essential to prioritize safety and follow each step meticulously.
- Always wear protective gloves and glasses if available.
- Never attempt to jump-start a car if the battery appears damaged or is leaking.
- It’s wise to invest in a quality set of jumper cables or a reliable jump starter pack, keeping it in your vehicle for emergencies.
By adhering to these guidelines and embracing the self-reliance these skills offer, you’ll not only enhance your own driving experience but also be prepared to assist others in need. A dead battery doesn’t have to be a major inconvenience—not when you’re equipped with the knowledge and tools to address it swiftly and safely.
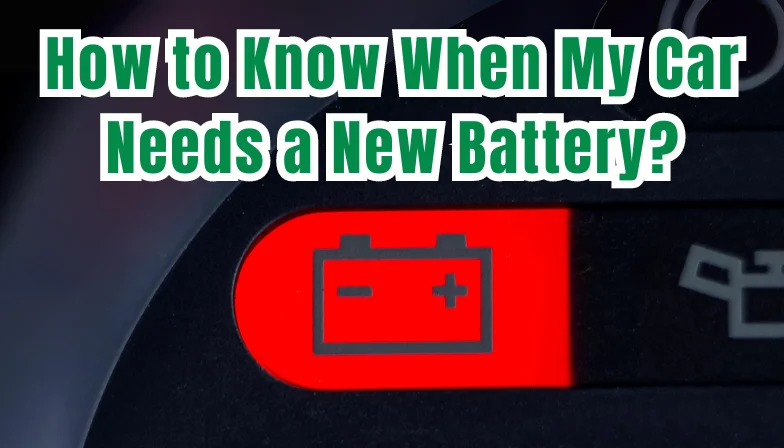
If you find that your car’s battery is losing power more frequently, it may be a sign that it requires more attention. After successfully jump-starting your car and ensuring it’s running smoothly, it’s important to consider the underlying health of your vehicle’s battery.
A battery losing charge can indicate ageing or an issue with the car’s electrical system.
To maintain the battery’s health and avoid future power losses, consider driving your vehicle for at least 40 minutes to allow the alternator to recharge the battery fully. If the problem persists, it may be worthwhile to have the battery and charging system checked by a professional. Regular maintenance and checks can extend the life of your battery and ensure your vehicle remains reliable on the road.
Check out this smart car battery charger/maintainer below.

Click to Read More About Car Battery Chargers and Charging Tips
Please note that this post contains affiliate links. This means if you click on a link and make a purchase, we may receive a small commission at no extra cost to you. Our reviews and recommendations are based on our own opinions and analysis, and we aim to provide you with the most accurate and helpful information to make your decisions. Your support helps us continue to provide valuable content. Thank you for your understanding and support.


